Instructions
- Prepare the Red Velvet Cake Layer: Preheat oven to 350°F (175°C). Grease and flour a 9-inch round cake pan. In a large bowl, whisk together flour, sugar, cocoa powder, baking soda, and salt. In a separate medium bowl, whisk together buttermilk, vegetable oil, egg, vanilla extract, vinegar, and red food coloring. Pour the wet ingredients into the dry ingredients and mix until just combined (do not overmix). Pour batter into the prepared cake pan and bake for 25-30 minutes, or until a wooden skewer inserted into the center comes out clean. Let cool completely in the pan, then carefully remove and level the top if necessary.
- Prepare the Oreo Cookie Crust: Reduce oven temperature to 325°F (160°C). In a medium bowl, combine crushed Oreo cookies and melted butter. Press the mixture evenly into the bottom of a 9-inch springform pan. Bake for 8-10 minutes. Remove from oven and let cool slightly.
- Prepare the Cheesecake Filling: In a large bowl using an electric mixer, beat softened cream cheese and granulated sugar on medium speed until smooth and creamy, about 3-4 minutes, scraping down the sides of the bowl as needed. Beat in the eggs one at a time, mixing until just combined after each addition. Stir in the sour cream, vanilla extract, and pinch of salt until smooth. Do not overmix.
- Assemble and Bake the Red Velvet Strawberry Cheesecake: Carefully place the cooled red velvet cake layer on top of the baked Oreo crust in the springform pan. Pour the cheesecake filling over the red velvet cake layer. Wrap the bottom and sides of the springform pan tightly with heavy-duty aluminum foil to prevent water from seeping in if using a water bath. Place the springform pan in a large roasting pan. Pour hot water into the roasting pan until it reaches halfway up the sides of the springform pan.
- Bake for 60-75 minutes, or until the edges are set but the center still jiggles slightly when gently shaken. Turn off the oven, crack the door open, and let the cheesecake cool in the oven for 1 hour. Remove from the water bath, remove the foil, and let cool completely on a wire rack at room temperature.
- Chill the Cheesecake: Once completely cool, cover the cheesecake with plastic wrap and refrigerate for at least 6-8 hours, or preferably overnight, for best setting and flavor.
- Prepare the Strawberry Glaze: In a medium saucepan, combine hulled and quartered strawberries, ½ cup granulated sugar, and lemon juice. Bring to a simmer over medium heat, stirring occasionally, until the strawberries soften and release their juices, about 5-7 minutes. Mash the strawberries slightly with a fork or potato masher. Stir in the cornstarch slurry and cook, stirring constantly, until the glaze thickens and becomes glossy, about 1-2 minutes. Remove from heat and let cool completely.
- Prepare the Strawberry Ice Cream Base: For intense strawberry flavor, you can roast the strawberries: spread the 2 pounds of strawberries on a baking sheet and roast at 350°F (175°C) for 15-20 minutes, until softened and slightly caramelized. Let cool. Alternatively, macerate: combine strawberries with ½ cup granulated sugar and let sit for 30 minutes to an hour to draw out juices. Once prepared, puree the strawberries in a blender or food processor until smooth. Strain the puree through a fine-mesh sieve to remove seeds, if desired, pressing on the solids to extract all liquid.
- In a large bowl, whisk together heavy cream, whole milk, ½ cup granulated sugar, vanilla extract (or scraped vanilla bean and pod), and a pinch of salt until the sugar is dissolved. Stir in the strained strawberry puree.
- Churn the Strawberry Ice Cream: If using an ice cream maker, chill the ice cream base thoroughly in the refrigerator for at least 2-4 hours, or preferably overnight. Churn the mixture according to your ice cream maker’s instructions, typically for 20-30 minutes, until it reaches a soft-serve consistency. For a firmer ice cream, transfer to an airtight container and freeze for at least 4 hours.
- For No-Churn Strawberry Ice Cream (Alternative): Omit the whole milk. Whip 2 cups cold heavy cream with ½ cup powdered sugar (instead of granulated) and 1 teaspoon vanilla extract until stiff peaks form. Gently fold in the strawberry puree. Transfer to an airtight container and freeze for at least 6 hours or overnight.
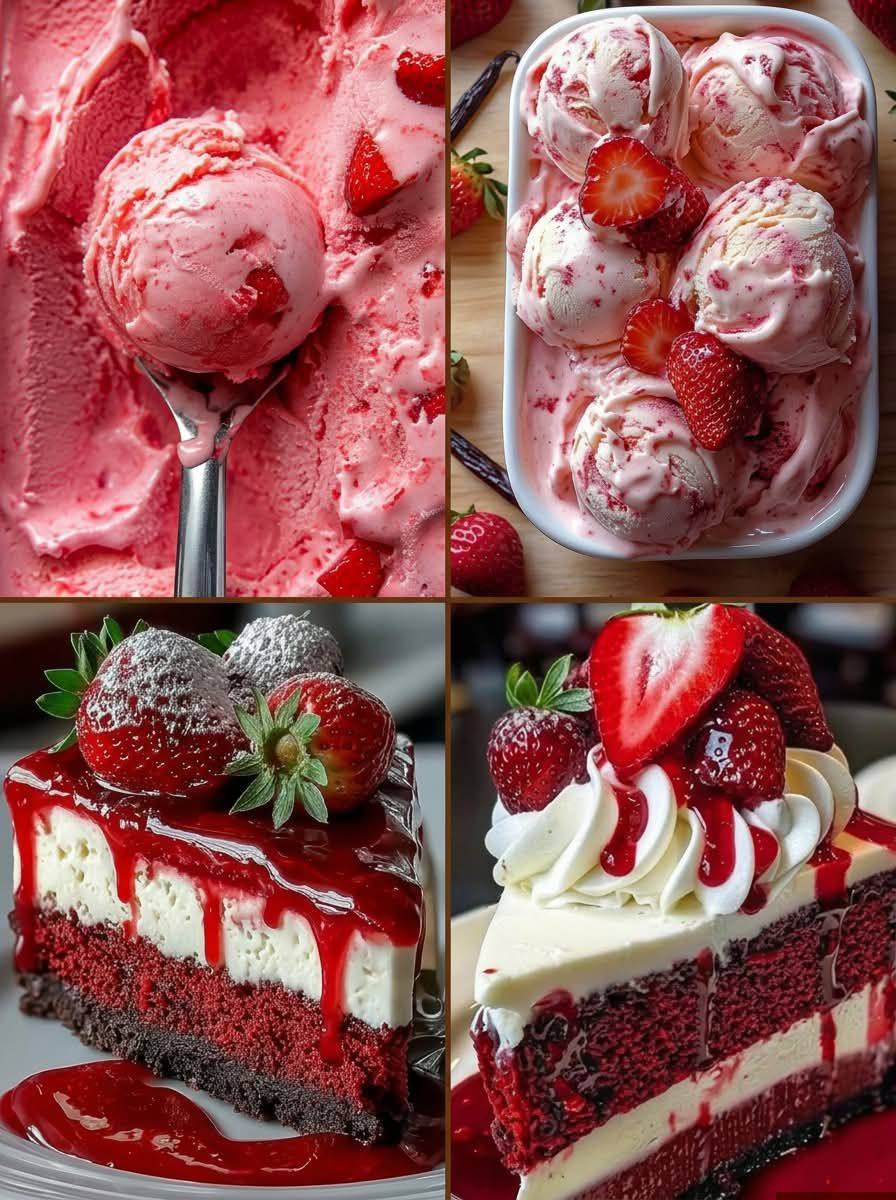
- Serve and Garnish: Once the cheesecake is thoroughly chilled, carefully run a thin knife around the edge of the springform pan before releasing the sides. Pour the cooled strawberry glaze evenly over the top of the cheesecake. Slice the cheesecake using a hot, sharp knife for clean cuts. Serve each slice with a generous scoop of homemade strawberry ice cream. Garnish with fresh whole strawberries, sliced strawberries, a dollop of whipped cream, a dusting of powdered sugar, and a decorative vanilla bean pod for the ice cream.
Cooking Tips and Variations
For the most vibrant red velvet cake, always opt for gel food coloring over liquid, as it provides a much more intense and stable color without adding excess moisture. If you prefer a natural approach, beet powder can deliver a beautiful subtle red hue. When making the cheesecake, avoid overmixing the batter once the eggs are added; this can incorporate too much air, leading to cracks during baking. A water bath is your best friend for a silky-smooth, crack-free cheesecake – it ensures even heating and a moist baking environment. Always allow the cheesecake to cool gradually in the oven before chilling it completely in the refrigerator; rapid temperature changes are a common cause of cracks.
To intensify the strawberry flavor in both the glaze and the ice cream, consider roasting a portion of the strawberries before pureeing them. Roasting concentrates their natural sugars and deepens their flavor profile. For the ice cream, using full-fat dairy is crucial for achieving that wonderfully creamy texture. If you’re going the no-churn route, ensure your whipped cream is stiffly peaked before gently folding in the strawberry puree to maintain maximum aeration. Don’t be afraid to add extra strawberry chunks (fresh or roasted) to your ice cream during the last few minutes of churning for added texture and bursts of fruit.
This recipe is highly adaptable. Feel free to experiment with other berry glazes – a raspberry or mixed berry glaze would be equally delicious. For a chocolate lover’s twist, you could sprinkle mini chocolate chips into the cheesecake batter or add a chocolate drizzle over the top. If you want to simplify, you can use a store-bought red velvet cake mix for the base, or even omit the cake layer entirely for a classic strawberry cheesecake with a cookie crust. For an extra touch of sophistication, infuse the cheesecake filling with a hint of orange zest or a splash of Grand Marnier.
Storage and Reheating
The Red Velvet Strawberry Cheesecake should be stored in an airtight container in the refrigerator for up to 4-5 days. It is best enjoyed chilled. We do not recommend reheating the cheesecake, as it can alter its delicate texture. If you have leftover slices, simply take them out of the refrigerator about 15-20 minutes before serving to allow them to slightly warm up to room temperature, which can enhance the flavors.
Homemade Strawberry Ice Cream should be stored in an airtight container in the freezer. It will maintain its best quality for about 1-2 weeks. Beyond that, while still safe to eat, its texture may become icier. To serve, remove the ice cream from the freezer about 5-10 minutes before scooping to allow it to soften slightly, making it easier to scoop and enjoy. Do not refreeze melted ice cream, as this can lead to an undesirable icy texture.
Frequently Asked Questions
Can I make this dessert ahead of time for a party?
Absolutely! This is an excellent make-ahead dessert. The red velvet cake layer can be baked a day or two in advance. The cheesecake itself needs at least 6-8 hours to chill, so it’s perfect to make the day before. The strawberry glaze can also be prepared a day ahead and stored in the refrigerator. The strawberry ice cream can be made several days in advance and kept in the freezer. This allows you to assemble and garnish right before serving, making entertaining much less stressful.
What if I don’t have a springform pan for the cheesecake?
While a springform pan is ideal for easy removal and presentation, you can use a regular 9-inch round cake pan. Line the bottom and sides with parchment paper, leaving an overhang on two opposite sides. This “sling” will allow you to lift the cheesecake out of the pan once it’s completely chilled and set. Just be aware that the edges may not be as perfectly clean as with a springform pan.
My cheesecake cracked during baking or cooling – what went wrong?
Cheesecake cracks are common and usually due to overbaking, overmixing the batter (which incorporates too much air), or rapid temperature changes. To prevent cracks, bake the cheesecake in a water bath for even heating, avoid overmixing, and allow it to cool gradually in the oven with the door ajar before chilling in the refrigerator. If it does crack, don’t worry! The strawberry glaze will beautifully cover any imperfections, and it will still taste delicious.
Can I use frozen strawberries for the ice cream and glaze?
Yes, you can use frozen strawberries for both the ice cream and the glaze. For the ice cream, thaw them first and drain any excess liquid before pureeing. For the glaze, you can use them directly from frozen; they will release more liquid as they cook, so you might need to simmer the glaze a little longer to achieve the desired thickness, or adjust the cornstarch slurry if necessary.